Friday, December 31, 2010

Christmas Season - Jesus' Birthday Cake and more

It's a really good thing the liturgical season of Christmas lasts so long because we finally ran low enough on cookies and candies to make a birthday cake for Jesus. It's actually pretty typical for our family birthday celebrations to turn into week long extravaganzas by the time we celebrate with extended family and friends, so really this is par for the course.

Inspired by Ace of Cakes (I've never really watched that show... we don't have cable, I just hear it's really cool) I designed this super fancy stable cake. Don't laugh...


What I really dreamed of making was this...


but fondant creeps me out.

Instead I went to my typical baking buddy...


That's right, all you'll need it a box of cake mix, chocolate and white frosting and yellow dye.

The pattern for the cake looks like this. On the left is how the cake would look if it was in one piece and on the right is how you assemble the star.

I often use the sheets as a stencil for cutting out the cake.


When working with smaller pieces I use toothpicks to hold them together. Just don't forget to take them out when serving.


Do the white and yellow frosting first.


Then add your chocolate including the manger. After I finished the manger I was frosted out, so I just put a plastic Jesus in it and skipped writing Happy Birthday above, I think we all knew who the cake was for. I'm also know to spray my finger with non-stick spray to make it sticky proof so I can smooth out difficult spots. And that ladies and gentlemen is the extent of my cake knowledge. Perhaps I should watch Ace of Cakes.


We've also watched Really Woolly Friends The Gift of Christmas by Dayspring...


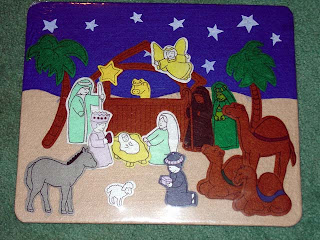
and played with our Nativity felt board. You have to scroll down to get to the product on the link. Is that so 1980's Sunday school or what?


Happy New Year to all. Maybe nobody will read this post because you are all out ringing it in, but I'm too lazy to find a babysitter, so we are in for the night. Maybe I'll celebrate with the east coast in a half hour and call it festive.

Tuesday, December 28, 2010

Christmas Season - Baby Jesus Rolls and more

The liturgical season of Christmas is in full swing at the Cotter home! Each night we have been opening an extended family present and doing a fun activity. Here's what we've accomplished:

To start we made some baby Jesus rolls for dinner tonight! I love these because of the symbolism behind Jesus being the bread of life and here we are, making baby Jesus bread.


The idea comes from here, but I called upon my favorite buddy to help make these quick...


Oh dough boy, what would I do without you? Especially when you are frequently on sale and coupons for you are always in excess?

Just tear apart your dough, assemble them into a swaddling baby Jesus...


watch out for "helpful" toddlers who think their plastic dogs are hungry (my preschooler said, "hey, put that on the blog!")...


brush them with egg yolk to give them the new baby glow and bake them according to the package directions.


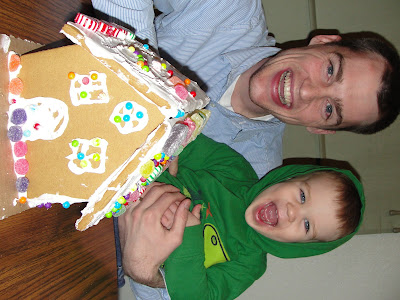
We also built a ginger bread house...


played with Christmas cookie cutters and Playdough...


and watched Veggie Tales' The Star of Christmas.


4 more days to go!

Tuesday, December 21, 2010

Christmas Stars

It's time for the final Christmas decorations craft! I told you we had a busy crafter-noon on Sunday! These are my Christmas stars that twirl when the heating vent  underneath them comes on, it's a great use of fake wind power.


What you'll need:

  • Gold card stock
  • White card stock
  • Red ribbion
  • Silver glitter glue
  • Star cookie cutters or stencils
  • Sharpie
  • Pencil
  • Hole punch
  • Scissors 
  • Paint brush (oops, not shown)
  • Glue stick (oops again, not shown)


Step 1: Using your stencils trace and cut out a big gold star and a little white star.
Step 2: Glue the little start onto the big star, but only put a circle of glue in the center, so the little stars edges will lift up when the glitter glue dries.
Step 3: Write Christmas words on each star. I used Joy, Peace, Faith, Hope, Love, Rejoice and Savior.
Step 4: Punch a hole in the top of the star.


Step 5: Squirt some glitter glue on the star and brush it around with a paint brush to cover the star.


Step 6: Tie various lengths of red ribbion through the hole at the top of the star.


Step 7: Hang from a window in your home (preferably under a vent so they can twirl :)


...out.

Monday, December 20, 2010

Christmas Stable Name Cards

More Christmas crafts! Today we made our name cards for Christmas brunch. The women in my family aren't big red meat or even meat in general eaters, so we opt for a delicious Christmas brunch over the traditional roast beast, poor men. What we lack in meat we make up for in sugar.


Perhaps you don't need directions for this one, but here they are anyway!


Here is what you will need:
  • Brown card stock or construction paper
  • Gold or silver stars (I used the foam sticker kind)
  • Card stock with a picture of baby Jesus and a bible verse printed on the bottom and middle of the page. As you can see you can print 4 to a page. I used the verse "For today in the city of David a savior has been born for you who is Messiah and Lord." Luke 2:11
  • Scissors
  • Glue stick
  • Marker
Step 1: Fold your 1/4 sheet printouts in half to make a table tent. No pic, but it looks like the blank paper on the left side of the picture below.


Step 2: Cut out your stable. If you use a 1/4 sheet as a guide you will be sure to create a stable that will fit with your printed table tent.


Step 3: Glue your stable onto face of your table tent.


Step 4: Add your star.


Step 5: Find a 4 year old who knows how to write their letters and ask them to put the names of your guests on each name card.

Optional step 6: If you cannot find a 4 year old, you can always write them yourself.

Sunday, December 19, 2010

Holly Napkin Ring Holders

It's been quite the crafter-noon at the Cotter home! We started in on the homemade Christmas decorations after a late night run to the craft store yesterday. The first item on the line up are our holly napkin ring holders.


One of our familiar Christmas carols is the Holly and the Ivy, which is often played without the vocals, so most people don't realize the meaning behind the song. Give it a listen here with the vocals which describe the Christian Christmas symbolism of holly and ivy. The lyrics go a little something like this:

The holly and the ivy, when they are both full grown,
Of all the trees that are in the wood, the holly bears the crown.
Refrain:
Oh, the rising of the sun and the running of the deer,
The playing of the merry organ, sweet singing in the choir.
The holly bears a blossom as white as lily flower,
And Mary bore sweet Jesus Christ to be our sweet saviour
Refrain
The holly bears a berry as red as any blood,
And Mary bore sweet Jesus Christ to do poor sinners good.
Refrain
The holly bears a prickle as sharp as any thorn,
And Mary bore sweet Jesus Christ on Christmas Day in the morn.
Refrain
The holly bears a bark as bitter as any gall,
And Mary bore sweet Jesus Christ for to redeem us all.
Refrain
While holly was originally a pagan symbol of fertility, the Christians "baptized" it by giving it a a new Christian significance. Some early Church fathers like Tertullian protested the idea, but here it remains as a traditional Christmas decoration staple.

Alright enough history, on with the craft.


Here is what you will need to make 1 dozen:

1 sheet of stiff red felt
1 sheet of regular green felt
1 spool of 3/8 in/3 yd gold ribbon
36 red pompoms
Tacky glue
Scissors
12 paper clips


Step 1: Cut the red felt into 12 strips. If you pushed all the strips together it would make a whole sheet of flet, so cut the page up like shown above.


Step 2: Glue a strip of ribbon to the center of each strip.


Step 3: Loop each strip into a circle, glue and hold together with a paper clip until dry.


Step 4: Cut out 24 holly leaves (2 per ring) from the green felt and glue them to the center of the ring.


Step 5: Glue 3 pompoms onto your leaves and let dry.


For a nice conversation starter you can explain the symbolism of holly to your guests!


Monday, December 13, 2010

Feast of St. Lucy

Early this morning we celebrated the Feast of St. Lucy!


In the Swedish culture (no there is not an ounce of Swedish blood in our family line) it is traditional for the eldest daughter to wake the family at dawn wearing a white dress with a crimson sash and a wreath of candles upon her head. She bears gifts of sweet breads and warm drinks in imitation of St. Lucy who gave away her dowry to the poor because she wanted to consecrate her life to Christ. Refusing to give up her virginity to the man to whom she was betrothed resulted in her martyrdom in the early 4th century.

Bean was extremely excited about playing the role of St. Lucy and did a fabulous job! She wore a flower girl dress from last spring, I tied a red ribbon around her waist and I made her paper crown in about 15 minutes last night.


For our feast we made elaborate treats just like they do in Sweden, including Lussekatter- St. Lucy Buns and St. Lucia's Braided Bread.


Okay, I just lied. Yes I did make the above breads for breakfast, but they took me a combined 30 minutes. Don't tell anyone my secret... on second thought, tell who ever you want. I give all credit to my sous chef...

yep, the dough boy.

For the buns I did the following:


I took a rectangle of the crescent roll dough, rolled it up and then formed it into the shape of a S. I also put a Crasin in each bend of the S and baked them according to the package directions.

For the braided bread I used the cinnamon rolls:


I used my kitchen sheers to cut the rolls into a spiral so they could roll out into a line. The first six rolls made for even cords, with three in each group. For the last two rolls I cut off a portion of the bottoms to make a 3rd cord that was the same length as the original two when put together. Then I braided all the cords into a circle and baked them according to the package directions.


We put icing and candles in the braided bread and then lit the candles and said a prayer. The kids blew out the candles and we feasted with hot cocoa!