Saturday, September 28, 2013

Ideas for October Feast Days and Celebrations

I've gathered most of my liturgical year posts from past Octobers into one post. I like organizing things. My plan is to do this for each month. I like organizing things. I've also added links to some of my favorite resources for this month's feasts and celebrations. Enjoy.


Month of the Holy Rosary

Other Ideas:
Children's Rosary CDs and coloring books: Holy Heroes

All Saints Day Costume Ideas

Other Ideas:
October 1st: St. Therese of Lisieux

Other Ideas:
Really, this site has it covered: Shower of Roses

October 2nd: Guardian Angels

Other Ideas:
October 4th: St. Francis of Assisi


Other Ideas:
October 5th: Feast of St. Faustina Kowalska

Other Ideas: (I've never posted on this feast day as it is my son's birthday!)
  • Prayers: Divine Mercy Chaplet: The Divine Mercy
  • Coloring Page: Wee Little Miracles (it's at the bottom of the post)
  • Craft: Divine Mercy Statue: Catholic Icing
  • Audio: St. Faustina by Glory Stories
  • Food: Take a heart shaped cookie, cake, pancake, rice crispy treat, brownie... and give it a blue frosting or blueberries ray and a red frosting or strawberries ray
October 22nd: Feast of Saint Pope John Paul II

Other Ideas: 
October 31st: All Hallow's Eve

Other Ideas:

Be saints, it's worth it!
Lisa

Thursday, September 26, 2013

Our Schedule for Classically Catholic Memory

I'm blogging my way through the four year Classically Catholic Memory (CCM) program here at Catholic Missionary Family. It's fun, it's audacious, and it deserves some more explaining as to how we actually accomplish each weeks' memory work.

Classically Catholic Memory is broken up into 18 weeks. Each week is comprised of the following eight components: religion, latin, history, science, math, timeline, geography, and great words. For each component the student has memory work based on each individual subject. For example, in religion the student either memorizes a scripture passage or a question and answer from the Catechism, or for geography the student memorizes the names and locations of the countries on a particular continent.

We spend two weeks to cover each week of memory work, which means it takes us 36 total weeks to get through a year of curriculum. The two weeks look roughly like this:

Week 1
Monday: Introduce all new memory work.
Tuesday: Lessons on the religion, latin, and geography memory work.
Wednesday: Lessons on the math, timeline, and great words memory work.
Thursday: Lesson on the science memory work.
Sunday night: Lesson on the history memory work (taught by dad).

Week 2
Monday: Review all current and previously introduced memory work.
Tuesday: Lessons on the religion, latin, and geography memory work.
Wednesday: Lessons on the math, timeline, and great words memory work.
Thursday: Lesson on the science memory work.
Sunday night: Lesson on the history memory work (taught by dad).

For additional work on memorizing each weeks' memory work, as well as to retain the memory work from pervious weeks, I keep a play the memory work CD while we work on CCM projects and as we run errands in the car.

We also are completing a study of the 50 states this year as we study North America for geography and there are times when my 2nd grader reads additional books related to our history memory work.

And if you're wondering how this works with our other curriculum plans, check out this post on our 2013-2014 homeschool year.

That's it! With the laid out schedule above it is has been totally manageable!

Be saints, it's worth it!
Lisa

Monday, September 23, 2013

Ideas for Classically Catholic Memory: Gamma Year: Week 3

I'm blogging my way through our four year curriculum program so I don't forget everything that worked for us! Please feel free to use what works for your family and share in the comments anything you would add. For more on Classically Catholic Memory go here.

Religion
The only thing I could come up with for reinforcing our Catechism memory work this week was to look up the question in the Baltimore Catechism #2. It's lesson 12B on page 79.

Latin
We are learning the Salve Regina by watching and listening to this version on youtube. I like this one because it has both Latin and English subtitles, as well as beautiful art.

History

Lesson 1: Cabot and Hudson
This week Kevin used Explorers of the New World to teach the kids about John Cabot (pages 45-49) and Henry Hudson (pages 103-107).

One of the 22 activities that Explores of the New World suggests is a popular dice game that sailors would play on long voyages called Liar's Dice.


Kevin and the kids played a simplified version of the game that did not include the confusing lying part.

Lesson 2: Jamestown

There are so many fun ways to learn about Jamestown! First we read a few books:


Then we made this sweet Jamestown replica from Homeschool in the Woods:


The replica happens to be in the free sample pages of their American Revolution Pack. The entire program is pretty incredible and something I just might be purchasing for upcoming history lessons.

Finally, the kids explored a few interactive Jamestown games:

History Globe
National Geographic Kids

Lesson 3: Pilgrims

For every one fun way to learn about Jamestown there are ten more fun ways to learn about the Pilgrims thanks to Thanksgiving. Kevin read The Pilgrims of Plimoth to the kids and Bean read Who's that Stepping on Plymouth Rock? on her own.


Then the kids made pilgrim finger puppets to play with on their Mayflower ship we made during Massachusetts week for our Journey Across America. They then proceeded to set up an elaborate scene and reenact the voyage in the basement all afternoon.


Science

Lesson 1
Our first science lesson this week included the following items:


One thing is missing, a helium balloon. Our grocery store hands out free kids balloons, so we picked some up the day of our experiment, but I forgot to take a picture of them before the helium ran out. The next time we went to the store we got a new balloon, which popped before we made it out of the parking lot. So, use your imagination here.

To start we talked about why one balloon blown up with helium floats, while another balloon blown up with Carbon Dioxide doesn't. This was the starting point for our discussion on atomic mass and atomic weight.

Next we made a complex diagram of a water molecule with the help of this TedEd video. Instead of using toothpicks and marshmallows, we used pipe cleaners and beads.


Instructions for both of the above activities are in the CCM Teacher Text.

Lesson 2:
And for lesson two you will need:


For our chemistry lapbooks each of the kids picked an element to turn into a flap-thingy. (I really don't know what to call it). Basically we made a little card and on the front of the card the kids wrote out the element as it appears on a periodic table. Then we cut the card into sections and wrote out what each section represented behind the flap. Got it?


And we finally got around to the polarity of water activity that the CCM Teacher Text suggests doing at some point during the first three weeks.


This kids loved this simple "experiment", although I don't think they really understood the science behind it, they were too busy gathering water droplets to pay attention to my explanation.

Math

Lesson 1

To help master the multiples of four, this kids headed over to ABC Ya to play multiples of four dot-to-dot. Big hit friends, big hit.

Lesson 2

Then at 36 weeks pregnant I played multiples of 4 hopscotch with my daughter. I felt fine while we played, but it took a really good nights sleep to get my legs to function again. Maybe that wasn't the most prudent game to play, but the weather will be getting cold soon!


Timeline

Lesson 1
We played Charades meets Blind Man's Bluff (the poker version) this week to learn our timeline cards. Each player took a turn drawing a card and holding it up to their forehead, so everyone but the person who drew the card could see the card.


Those who could see the card then acted out the card until the person with the card on their forehead accurately guessed the card. Another timeline winner, I think I'm on a roll.

Lesson 2
And we put some more pictures into our timeline book.


Geography

We started learning about the provinces of Canada this week. Having never learned them myself I couldn't properly pronounce half of them, like Saskatchewan. Thinking I was smart I quizzed my husband on the locations of each province, apparently he knew them all. Busted.

We used the book Wow Canada! to learn more about each province.


Great Words I
For our last week of memorizing Bed in Summer we used Pretty Poems and Wonderful Words. Beans response to the book was "This is a baby book.", and it is. But the poem is in it and Pal thought the flaps were cool.

Be saints, it's worth it!
Lisa

Tuesday, September 17, 2013

Kevin's First Book Is Now Available For Pre-Order!

A few months ago Kevin had an idea. Someone should write a book with daily meditations based on the words of Pope Francis. Then he had another idea, maybe he should be that someone. With all of Kevin's work on popealarm.com he knows that lots of people love our new Pope, his simplicity, and his get-to-the-point style of speaking and writing... so he went for it and sent a proposal to three publishers.

Within hours the first publisher contacted him asking for a phone conference to discuss his book idea and within a week all three publishers expressed various levels of interest. After several phone conversations and negotiations he signed a contract with Our Sunday Visitor and the book's first deadline is at the end of this month!

Yes, being eight months pregnant, just finishing a whole house remodel, homeschooling two kids, and having a husband who spends his nights and Saturdays working on a book has been insane. I don't suggest this kind of behavior... although I wouldn't trade any of it!

Today OSV sent Kevin the cover of the book, and it is now available for pre-order on Amazon with a publication date of November 15th. You can thank us later for allowing you to get all of your Christmas shopping done in one swoop by buying a copy for each person on your list. :)


The book will have 365 quotes from the writings and words of Pope Francis, followed by reflection questions written by Kevin. When possible the quotes will line up with the liturgical calendar. For example, January 1st's quote is on Mary because the 1st is the Solemnity of Mary, Mother of God. Kevin has now thoroughly read everything our Pope has written and said since his election, as well as anything published from his time as Cardinal Jorge Bergoglio. Although he's never met the man, he knows him pretty well.

Please join us in praying with the intersession of St. Therese for the amazing words of Pope Francis to speak to the hearts of those who hear them via the book. And if you are feeling really prayerful please pray for us as Kevin wraps up the first draft over the next two weeks and then completes final edits around the time when the baby is born!

Be saints, it's worth it!
Lisa

Monday, September 16, 2013

Journey Across America: Connecticut

This post is part of a 50 state Journey Across America. For information on the basics of this project check out this post. I wasn't planning on documenting this project until we were six states in, so the first five states are a bit lacking in original photos, but the next 45 will be full of them!

The Books:
We began by reading N is for Nutmeg and then Bean used the information she learned to make a notebook page for her United States scrapbook.

For literature this week Bean read some of the books from the Moffat series by Eleanor Estes. The Moffats, The Middle Moffat, Rufus. M., and The Moffat Museum are a delightful series that chronicles the adventures of the four Moffat siblings. Bean really enjoyed these chapter books.


Other Connecticut books to consider include: A Picture Book of Harriet Beecher Stowe by David A. Adler, 26 Fairmount Avenue by Tomie dePaola and The Courage of Sarah Noble by Alice Dalgliesh.

Kevin also taught the kids about Connecticut using the Our United States of America: Catholic Social Studies textbook.

The Food:
Inspired by Shower of Roses we made Red Robin burgers.


So, truth be told, this is just a plain old hamburger. We did make the Shower of Roses Red Robin Hamburgers, but I didn't take a picture of it, so this burger is just a placeholder.

The hamburger was most likely invented in Connecticut and the state bird is the Robin, thus the Connecticut connection... pretty brilliant idea if you ask me.

The Activity:
Phineas Taylor Barnum, of the Ringling Bros. and Barnum & Bailey, was born in Connecticut, so we made this circus tent craft from First Palette this week.


This adorable craft was highly enjoyed by both kids and they STILL have them sitting in their rooms.

Massachusetts is coming up next!

Be saints, it's worth it!
Lisa

Friday, September 13, 2013

7 Quick Takes Friday: Edition 7

- 1 -

It. Is. Finished.


The final piece of our home restoration project is over and I am thrilled about our new kitchen.

Here is the before-ish picture (the original paint is the white-ish paint):


When we bought our beat up former rental I thought this process would be fun and exciting, now I realize that the fun and exciting part comes when you finish fixing it up! While it's been a ton of work I'm so glad we did it. I learned a lot, (like how to remove TWO layers of carpet, how to change electrical outlets, and how to survive in an AC free house (we do have a swamp cooler) until you can install ceiling fans), prayed a lot, (for patience and to not freak out over the little things... like the fact that our new oven does not fit in the island!!! The manufacture came out to look at it and admitted that it is a design flaw and they are trying to figure out a solution for us), and am extremely thankful to all those who helped make our house a home (including my husband, family, friends, and professionals).

Here is what we changed:
  • Painted the cabinets white. The house already had two types of cabinets and we had to restructure/fix some broken cabinets, which resulted in having three! Painting them all white makes the differences barely noticeable. 
  • Got a new sink and faucet. The old faucet leaked out the back, which resulted in mildewy caulk all along the back of the sink and a rusting sink. 
  • Replaced the counters. The old ones had many chips and stains on them.
  • Added a backsplash, because it's beautiful.
  • New stove! Our old one only had two functioning burners... and I couldn't get a replacement because the parts are no longer manufactured.
  • The wall color. Whitish walls and white cabinets would have been a lot of white.
  • The electrical outlets. None of them were up to code with GFI (I don't really know what that means) and most of them had reverse polarity issues (I don't really know what that means).
What we didn't change:
  • The floors. I like them so much better now that they are not the same color as the cabinets!
  • The hardware. I love the dark and light contrast on the cabinets.
  • The fridge and dishwasher, hooray they still work! We did have to replace the fish tank line they used for the fridge water line, but you can't see that.
  • The cabinets... kind of. Painting them white was way cheaper than getting new ones, even with the repairs that were needed. For example, the cabinets above the fridge actually didn't have a bottom. When the old owners bought a new fridge they must not have realized how much bigger the new fridge would be, so they just cut off the bottom of the cabinet over the fridge, removed the flooring under the fridge, and called it good. Expect the fridge was working overtime with no room to vent, so we put floors in and built a little box over the fridge.
  • The lighting... kind of. We switched some light fixtures around in the house, as my husband hit his head on most of them because they were so low and misplaced.
- 2 -

This week I have been working on a blog post for FOCUS.org on 30 dorm friendly bible study snacks. It was the perfect week to do it as I didn't have a full kitchen, so as I made many of the treats I knew they would work in a dorm setting. My kids were very grateful for this post idea because it meant that they got to be the taste testers from some yummy snacks.

Mini fruit pizzas: graham crackers, frosting, and fruit

- 3 -

Yesterday I hit the one month until my due date mark! I feel like I've been pregnant forever, but I think most mom's feel that way.

- 4 -

I put together a post on how to paint saint dolls this week. It was easy to write because I've sent out a few emails with this info, so I just pulled it from my sent mail. In the future I can give people a link to the post instead! That's efficiency in my world.

Any guesses as to who this is? Don't cheat, try to figure it out before you click on the link!

- 5 -

Bean, my choleric daughter, began working on her Christmas presents this week. What?! I'm pretty go get em when it comes to planning, but this girl got that gene super charged. Starting on her presents was all her idea. 


She started cross stitching with yarn in a diagonal pattern, and has now moved on to the real deal. This means I've been threading a lot of string and tying a lot of knots this week.

- 6 -

I usually have a folding laundry show that I default to while accomplishing this mundane task... it motivates me to actually do it. Lately I've been re-watching Lark Rise to Candleford. It's like 40 hours, and it's like so great. I forgot how great it was, which is awesome because this also means that I have forgotten how some of the story lines end, so it's like watching it all over again. You should really watch the series if you haven't. Did I mention it's all on youtube?

- 7 -

I need baby book recommendations. Please comment below. I haven't changed a diaper (unless you count the ones I've done while watching my friends' kids), been sleep deprived, nursed a baby, or dealt with poop and spit up stains in several years. I'm sure most of it will come back to me, but my baby brain can't handle a pile of books, so what are the essentials to review? Please comment below.

Linking up at Conversion Diary!


Be saints, it's worth it!
Lisa

Wednesday, September 11, 2013

How to Paint a Wooden Saint Doll

Many of you have told me how you are organizing a saint doll exchange! I think that is fabulous. So fabulous that I've put together another resource to make your exchange even better. Here is your step by step guide for painting a saint doll.

Step 1: Design your Saint

Before you begin painting you'll want to figure out what you want your finished doll to look like. I always start by trying to find examples by checking the following places:
If I can't find any I'll do a quick google search for images of the saint. Then I research the saint to find out what symbols, colors, or features I want to include to help the saint be identifiable.

Next I draw out a rough sketch of the saint, so I have a template to follow.


Bean is receiving her 1st Holy Communion this year, so I decided to paint a Bl. Imelda who is the patroness of a fervent first communion. Her incorrupt body is dressed in an all white habit and there is a wreath of flowers around her head, so I sketched those into my doll. I also included the symbol of the host because of what she is the patroness of.

Step 2: Gather your Supplies

Now that you are ready to paint you'll need to following:


To buy:
Wooden dolls
Acrylic paints
Brushes
Finish
Metallic gold paint (optional)

What you probably already have:
Water in a cup (for rinsing your brush)
Paper towels (for drying your brush)
Paper plate (for mixing paint)

Step 3: Start Painting

When I paint multiple saints, I do all of my saints at once, step by step. So, I'll paint every saint's skin, then every saint's dress, then every saint's cloak, etc. I think this is faster than doing one at a time. In general, for the base of the doll I do things in layers, so I don't have to do a detailed job with every color.


Finally I add on the details and symbols. This is where the optional gold paint comes in handy. I think the shiny gold adds a little bling and saintly glow.


I always do the eyes last to make the saint "come alive" as the kids say. Boy saints always get dots, girl saints always get eyelashes. This is the simplest way to make eyes for someone of my ability. Pal once asked why the girl saints are always praying. I guess that's what closed eyes means to a four year old.


A few tips and tricks:
  • Don't use a sharpie! It will bleed when you spray the doll with the finish.
  • Rinse and clean your brush often when doing detail work. Your brush will start to get a ticker line as you add on more and more paint.
  • If you mess up when painting on dry paint, grab a damp paper towel and wipe it off right away. Usually you can clear the mistake without having to repaint the area, but that can't always be avoided.
  • Experiment with the back of your brush or toothpicks for very fine details.
Step 4: Finish Up

Spraying your dolls will help them hold up longer. Don't over do it however as the finish can run on your dolls and leave a yellow spot. It's better to do two light layers than one heavy one if you think you might get spray happy. Just let the first layer dry before you add a second.

When your dolls are dry, write the name of your saint on the bottom of the doll. You might think you'll never forget them, but some dolls can look pretty similar if they are from the same religious order!

Happy painting!

Be saints, it's worth it!
Lisa

Monday, September 9, 2013

Ideas for Classically Catholic Memory: Gamma Year: Week 2

I'm blogging my way through our four year curriculum program so I don't forget everything that worked for us! Please feel free to use what works for your family and share in the comments anything you would add. For more on Classically Catholic Memory go here.

Religion

Lesson 1
This week's religion memorization asked "What are the chief marks of the Church?" I found a printable from Look to Him and be Radiant that I was able to use for a craft to learn the four marks of the Church.


Lesson 2 
We headed over to Family Catechism again this week for another video lesson with Sr. John Vianney. She does lightly touch on abortion in the video, so if you haven't gone there yet, you might want to stick to the written material on the four marks.

Latin
We are learning the Salve Regina by watching and listening to this version on youtube. I like this one because it has both Latin and English subtitles, as well as beautiful art.

History

Lesson 1: Aztecs, Incas, and Mayans
Kevin taught the kids about these three cultures using the following books from the library:

Everyday Life of the Aztecs, Incas, and Maya by Neil Morris
Aztec, Inca and Maya (Eyewitness Books)

Lesson 2: Cortez
So this is a dad original...


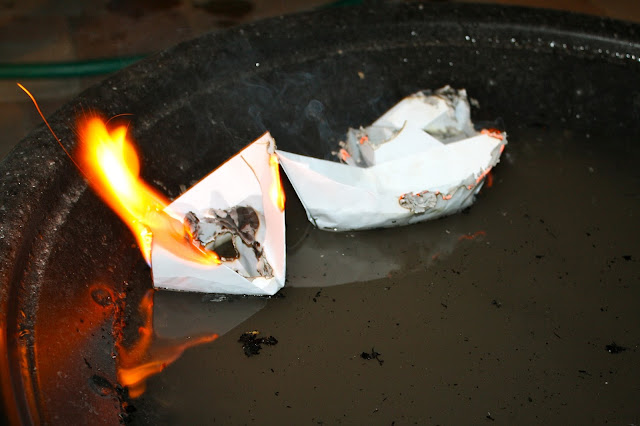
Wait, what is going on here? Just a lesson on Cortez and the story of how he burned (some say sank) his ships shortly after landing in Mexico to defeat the Aztecs for Spain. Getting rid of the ships ensured that no one could bail on him, thus increasing his chances for victory. In the end you could say his plan worked.

The kids and Kevin made paper ships and then floated them in our fire pit... until Kevin, I mean Cortez, lit them on fire.

Update: I recently found a book titled The Friar and the Knight: Padre Olmedo and Cortez from the American Background Catholic Series! Check it out!

Lesson 3: Our Lady of Guadalupe


When learning about the Aztecs I didn't want to leave out our Lady of Guadalupe! We read Juan Diego: Mary's Humble Messenger and then colored a picture of Our Lady from 1coloring-pages.com to finish off week two's history. You could also read The Lady of Guadalupe by Tomie de Paola.

Science

Lesson 1
Here is what you will need for this lesson on the elements.


We started by looking at, and reading about, the periodic table. Well, in reality I just kind of watched my friend Jill, who happens to be a chemistry teacher, who happened to be in town last week, teach the lesson. She did a great job, so just find yourself a Jill and you will be set.


Then we watched Meet the Elements by They Might be Giants. This little music video is highly entertaining and informative. I get the song stuck in my head sometimes.


Next we made an elements mini-booklet from a printout in Discovering Atoms, Molecules and Matter for our chemistry lapbook.


And finally, using a guide from Plumbing Excellence, we did an experiment on empty space in atoms using powdered sugar and water.

We also explored the elements by looking at The Elements: A Visual Exploration of Every Known Atom, which is a gorgeous book, and downloaded Periodic Table+ (lite), which the kids had fun poking around on.

Lesson 2
And the supplies for lesson two are...


First I had the kids color their own periodic tables for their lapbooks.


We printed ours from Discovering, Atoms, Molecules and Matter, but if you don't have the book you could print one from here.


Then we watched a youtube on molecules and made classic toothpick and mini-marshmallow molecules. Directions for this experiment can be found in your CCM manual. Below are very simple versions of H2, N2, O2 and H2O. For a lesson on how to make a more accurate model of a water molecule check out this Ted-Ed video.


Math

Lesson 1
For learning how to skip count the 3s we divided 36 frosted covered cheerios (to make the activity more enticing) into groups of three. Then we skip counted them out several times, ate one from each pile and skip counted our 2s for review.


Lesson 2
Using a hundred chart which I downloaded from Currclick the kids put markers on the multiples of three.


Timeline

Lesson 1
This week we played a bean bag toss game to review our timeline cards. We don't have any bean bags, so per the suggestion of Pal, we used bean filled animals. I think this made the game even cooler.

I taped the timeline cards to the floor and labeled the animals 1-8. The kids had to toss the animals to the timeline cards in order.


Once they got a part of the animal to touch the card, they could move on to the next card and then I checked them for accuracy. They loved this!


Lesson 2
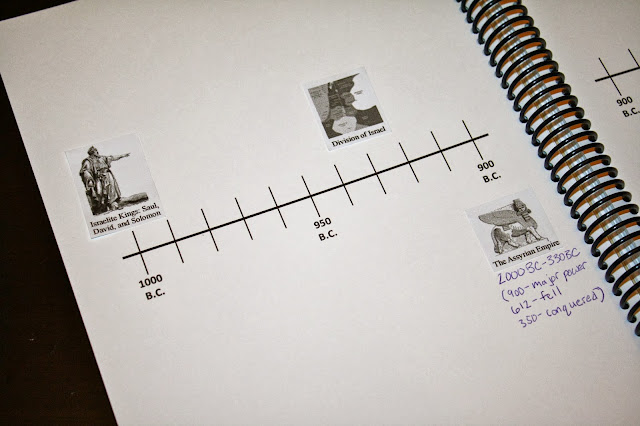
We added 8 more icons to our timeline book. I'm finding that looking up the dates is the most difficult part of this process, as different sources have different dates for these early events! I figure if we get them in the general vicinity all will be fine.


Geography
I grabbed a copy of The Four Oceans (Rookie) at the library to introduce the oceans. Then we pulled out our floor map and I had the kids label the oceans, as well as add some sea creatures to the map.


Great Words I
We worked on memorizing the second stanza of our poem by reading it from A Children's Treasury of Poems.

Week three plans will be up in two weeks!

Be saints, it's worth it!
Lisa