Monday, April 7, 2014

How to Make Ukrainian Eggs (Pysanky) for Beginners

During my time as a Benedictine Hall Director, a resident of mine shared with us her family's Pysanky tradition. It was such a quite and meditative way to spend an afternoon that now, years later, making Pysanky is our Holy Saturday Tradition. 


Traditional Christian Pysanky are rich with meaningful colors and symbols, such as red for the blood of Christ and drawn wheat, crosses, fishermen's nets, etc while the egg is a symbol of the empty tomb and the new life that came from it. Slowing down and creating these beautiful works of art, which remind us of our faith in Jesus, helps keep our family focused on this day of waiting for the Resurrection.

I pulled out my dyes today and made a test egg to ensure they were still effective. While I was at it I took photos of the process so I could put together a tutorial on how to make these beautiful eggs. If you have older children who are too old for dying eggs with the tablets you get from a box, this is a fantastic way to continue the egg dying tradition. Happily, we've found that no matter what a person's artistic ability is, anyone can create an egg that they are proud of!

Here are the supplies you will need:


And for fun, two children's picture books on Ukrainian Eggs are Rechenka's Eggs and Easter Eggs for Anya. 

I should note here that I am not an expert on this topic. How we make our eggs is probably not the "right" way to make them, but it's the best way for us in terms of time and cost. There are things I won't dive into here, like varnishing eggs, whether or not to empty the eggs and when the best time to do so is, properly drying them out. Check out Learn Pysanky if you want to really get into this tradition, what I'm sharing is a family friendly, get it done in one afternoon experience.

Simplicity warning finished. Moving on to...

Step 1: Empty Your Eggs

Like I said, people debate about when to empty your eggs, if ever, but what we've found is that it's easiest to empty them right from the start, with a little help from the Blas-Fix.


Here's what you do:

Thank you to my 5 year old son for taking these pictures... I did a lot of cropping.
First drill a hole in the egg with the green stick. Just spin it back and forth until the shell is punctured. Then use the clear handled stick to poke the egg yolk in the egg until it is broken and runny. This helps the guts come out more easily. Next use the yellow squeezer to force air into the egg, which forces the guts out. You don't have to put the tip into the egg, just hold it over the hole and the guts will flow out. Finally cover the hole with wax. We'll get to using wax in a bit, but don't forget to plug your egg with wax or it will fill with liquid when you dye it.

Step 2: Draw Your Guidelines

(This design can be found at Learn Pysanky, which is a has everything you'd ever want to know of the topic!)

Using rubberbands to ensure straight lines and complete circles draw the guidelines and for your egg. The pencil will come off in the dying process, but make sure NOT to erase the lines if you make a mistake because dye won't stick to the egg where eraser has been rubbed on it.


Now your egg is ready to be written on with wax!


Step 4: Fill Your Kistka with Wax

This is really quite easy. Just hold the metal portion of your kistka over the fire for a few seconds until it is hot, then scoop some wax into the back of the kistka. If it is hot enough the wax will melt right into the well, if it doesn't put your kistka over the fire again. Now you are ready to write on your egg.


Step 5: Apply Wax, Dye, Dry, Repeat

Next you will begin a three step cycle. First, using the hot wax from your kistka, draw on your egg where you would like the current color of your egg to be preserved. In the first picture of the sequence below, everything that I drew with black wax will now remain white. Second, dye your egg the next lightest color that you would like to use, in my case this was orange. Third, allow your egg to dry. Now you can begin the process again by writing on your egg to preserve your new color, followed by dying it the next lightest color (red), and allowing it to dry.


(Here lies the disadvantage to emptying your eggs before you begin... hollow eggs float. Try holding them down with the back of a spoon, or rotate them in the dye every few minutes.)

Step 6: Melt Wax and Wipe Clean

Once you are finished with the writing and dying process you are ready to melt off the wax that has been preserving the colors of you pysanky. Hold your egg close to a candle flame to melt the wax and then whip it clean. 


Repeat until your egg is wax free and you are finished!


Check out these posts for more of my liturgical ideas!
Ideas for Lent
Ideas for Holy Week
Ideas for Easter Season

Be saints, it's worth it!
Lisa

Saturday, April 5, 2014

Moving Jesus Along a Holy Week Path: An Activity for Kids

While pulling together my post on Holy Week ideas I kept running into these cute Holy Week banners and wanted to create something similar, but without felt. (I have a bit of an aversion to felt... I cut up tons of it when Bean started the Little Saints preschool program and now I avoid it when possible.)

I found a beautiful wooden Holy Week craft at Joyful Mama's Place and instantly knew that it was the version of the felt craft that I was looking for. I gathered some supplies, tweaked the prototype, and in a few hours created this...


Jesus (the wooden doll) will begin his journey down the path of Holy Week on the far left green tile with palms for Palm Sunday, and then be moved one space each day until he reaches the far right gold tile with flowers for Easter Sunday.


We might add a tea light to each square as the days progress and light them at night during our Lenten family prayer time. The addition of fire always goes over well during prayer time.

So you wanna make your own? Here's what you'll need:


  • A wooden board that is roughly 3x24 inches
  • Acrylic paints
  • Wooden doll
  • Paintbrushes
  • Ruler (preferably one as cool as mine)
  • Pencil
  • Embellishment symbols (optional, not pictured)
Step 1: Divide your Board


Using your ruler and pencil, divide your board up into 8 equal parts. If you have a custom cut board that is 24 inches long, each part will be 3 inches. Ours was about 22 inches long since I found it in the pile of random wood in our crawlspace.

Step 2: Paint the Squares


Here are the colors I chose for the various days:
  • Palm Sunday - Green (for the palms)
  • Holy Monday to Holy Wednesday - Progressively darker shades of purple (for the color of penance)
  • Holy Thursday - Brown (for Jesus giving us His body in the form of bread at the Last Supper)
  • Good Friday - Red (for the blood Christ shed)
  • Holy Saturday - Black (for the day of mourning and waiting)
  • Easter Sunday - Gold (for the glory of the Resurrection)
Step 3: Paint a Jesus Doll


For instructions on how to paint a wooden doll, check out my tutorial!

Step 4: Embellish with Symbols


Here are the symbols I chose for the various days:
  • Palm Sunday - Felt Palms (I know, don't judge me.)
  • Holy Thursday - Mini Chalice and Paten (It looks like Shepherd's Closet is no longer making my set... which will temporarily be relocated from our Saint Doll Cathedral... this set would work just as well. You could also make some out of clay.)
  • Good Friday - Crucifix 
  • Holy Saturday - Stone 
  • Easter Sunday - Flowers
I'm lovin' how this craft turned out and can't wait to add it to our repertoire this year!

Check out these posts for more of my liturgical ideas!
Ideas for Lent
Ideas for Holy Week
Ideas for Easter Season

Be saints, it's worth it!
Lisa

Thursday, April 3, 2014

Ideas for Living Holy Week in your Home

One of my favorite weeks of the year is Holy Week. The beauty, the mystery, the anticipation... I love it all. There are an overwhelming amount of ways you can keep this sacred week holy in your home, below are a few of my favorites.

General Ideas for Holy Week:


Moving Jesus Along a Holy Week Path


Book List

Other Ideas:
Palm Sunday
Other Ideas:
Other Ideas
Good Friday
Good Friday 2014

Other Ideas:
  • Shroud the images of Christ in your home with purple cloth
  • Live by candlelight and/or in silence today or from noon to 3:00
  • Prayer
    • Attend the Celebration of the Lord's Passion
    • Pray the Sorrowful Mysteries
    • Pray the Stations of the Cross
    • Begin the Divine Mercy Novena 
  • Crafts: Calvary Hill Scene: Catholic Inspired
  • Food
Holy Saturday


Holy Saturday 2011
How to Make Ukrainian Eggs (Pysanky) for Beginners

Other Ideas:
  • Get ready for Easter Sunday!
  • Food
    • Take your food to be blessed at Church
    • Make Easter breads/prepare for Easter meals: Catholic Cuisine 
    • Easter Story Cookies: Catholic Icing (Made on Holy Saturday night, eaten on Easter Sunday)
  • Crafts
    • Make a Pascal Candle 
Check out these posts for more of my liturgical ideas!
Ideas for Lent
Ideas for Easter Season

Be saints, it's worth it!
Lisa

Monday, March 31, 2014

Ideas for Classically Catholic Memory: Gamma Year: Week 14

Classically Catholic Memory: Gamma Year: Week 14
I'm blogging my way through our four year curriculum program so I don't forget everything that worked for us! Please feel free to use what works for your family and share in the comments anything you would add. For more on Classically Catholic Memory go here.

Religion
Using this week's Scripture memory work, I made a copy work worksheet for the kids at Worksheet Works so they could practice their handwriting while working on commiting the verse to memory. While doing the worksheets we listened to two Angel Food stories on loving your neighbor as yourself: The Saturday Morning Special and The King with the Black Heart.

Latin
We are learning the Anima Christi by listening to a few different versions on youtube.

History

Lesson 1:
The history topic of the week was the Constitution. I read the kids A More Perfect Union and then Kevin took to the white board and did his history explanation thing.

History takes place on Sunday night, hence the PJs.
Well, Pal was truly interested because the next day I found him giving 5 month old Peanut his own lesson on the government. He told her "We vote for the president, and he picks the judges. But if he picks bad judges, then we don't vote for him anymore."


Lesson 2:
For our next lesson we made this sweet craft:


We used the information we found at kids.usa.gov to write about each branch behind it's green leaf section.

Then the kids watched a Liberty's Kids episode titled We the People and this School House Rock video that summarizes the branches of the government in 3 minutes.

Science
To begin, there are three movies you can watch this week, so pick one, or watch them all: Magic School Bus Gets a Bright Idea (there are ghosts in this one, heads up), Bill Nye: Light and Color, Bill Nye: Light Optics, Bending, and Bouncing. Now on to the actual lessons.

Lesson 1
The supplies we used included:


Our lesson began with reading All About Light for a basic introduction to light.

Next we did Activity 2 from the CCM Teacher Text. The point of this activity was to teach them how light rays reflect off of objects, which allows us to see objects. This involved my children looking at a plastic baggie, piece of waxed paper, and piece of construction paper. They were supposed to note that they could see clearly through the baggie (although they argued with me on this one, so we scratched the baggie and I had them look through a window) because it is transparent, they could sort-of see through the waxed paper because it is translucent, and they could not see through the construction paper because it is opaque.


Then we headed to a dark room for Activity 3 to learn about reflection using a mirror, flashlight, and spray bottle... directions are in your Teacher Text... and I couldn't get any decent pictures of this activity!

Lesson 2
Material for lesson 2 included:


Beginning with a book again, we read Day Light, Night Light. Then we used fruit to discuss visible light, color, and absorption.

Next, we did Activity 4, which showed how white light is actually a rainbow of colors that are either absorbed or reflected by objects. They suggest using a prism to demonstrate this truth, but I didn't feel like buying one, so instead I used the mirror-in-a- bowl-of-water-with-a-flashlight-reflecting-onto-a-white-piece-of-paper method.


Finally to teach the kiddos about light being refracted we did Activities 4 and 5 from the Teacher Text.


Math
I couldn't find a free worksheet on the area of a square, so I made one. I bet you are as talented as me and could do the same.


Timeline

Lesson 1
Timeline Tube Towers. That's what we called it.

I wrote the 8 timeline cards on 8 toilet paper tubes and then had the kids build a tower out of them in the correct order. While building, the tower fell down several times, which gave them more practice in committing the order to memory. Brilliant, I know.


This would make for a fun co-op game if you made two sets and had the kids race to see who could complete the tower, in the correct order, without it falling over, first.

Lesson 2
Eight more timeline pictures found a permeant home in our timeline book this week.

Geography
Now that we have memorized all of the countries in North America, we are focusing on memorizing our continent's major geographical features. I'm letting our Journey Across America continue to be the supplemental fun on this one, as I point out these features as we study the states they reside in.

Great Words I
We continued memorizing "Pocahontas" by Rosemary Carr Benet this week.

I don't know of any picture books of the actual poem, but as you memorize it you could do several things to learn about Pocahontas. Check out a book on her, watch the Disney movie (maybe, I don't know if it's any good, I've never seen it), or check out this Pinterest board for snack and craft ideas.


Be saints, it's worth it!
Lisa

Thursday, March 27, 2014

Journey Across America: Tennessee

This post is part of a 50 state Journey Across America. For information on the basics of this project check out this post.

The Books:
We began by reading V is for Volunteer State and then Bean used the information she learned to make a notebook page for her United States scrapbook.

Then we read some Tennessee picture books: A Picture Book of Davy Crockett, Davy Crockett: A Life on the Frontier, Sally Ann Thunder Ann Whirlwind Crockett, and Daniel's Duck.


We also taught the kids about Tennessee using the Our United States of America: Catholic Social Studies textbook.

The Food:
It was impossible to not make the former official sponsor of the Grand Ole Opry, the Goo Goo Cluster, for our Tennessee state food. Invented in Nashville, the Goo Goo Cluster is the world's first ever combination candy bar. I thought about buying them online, but at $26.95 for 12, when we only needed 2, I opted to make them instead. We used a recipe from food.com that omitted the carmel, but I thought it was close enough.


The Activity:
With Tennessee being home to "Music City, USA" (Nashville) I opted to share with the kids the rich music history that Tennessee holds. We listened to some country music (Bristol is the Birthplace of Country Music), some Elvis (Graceland, need I say more?), some Beale Street Blues (Memphis is the Birthplace of the Blues), and some clips of the Grand Ole Opry and Jubilee Singers.

Ohio is our next stop on our Journey Across America!

Be saints, it's worth it!
Lisa

Monday, March 24, 2014

Ideas for April Feast Days and Celebrations

Here are some of our favorite traditions for the month of April. This is by no means an exhaustive list, rather it's my way of creating a resource that I plan to revisit each year for myself! I hope you can find it beneficial as well!

Month of the Holy Spirit
The month of April is always filled with the seasons of Lent and Easter, so the Saints whose days we celebrate during April are often suspended by other Holy Days. My list is short this month because we spend so much time on Holy Week and the Easter Octave!

April 16th: St. Bernadette

The Charcot: St. Bernadette's Home in Lourdes 
April 29th: St. Catherine of Siena
Be saints, it's worth it!
Lisa

Sunday, March 23, 2014

Ideas for Classically Catholic Memory: Gamma Year: Week 13

Classically Catholic Memory: Gamma Year: Week 13
I'm blogging my way through our four year curriculum program so I don't forget everything that worked for us! Please feel free to use what works for your family and share in the comments anything you would add. For more on Classically Catholic Memory go here.

Religion
At Worksheet Works I created printing worksheets for the kids so they could practice their handwriting and learn their memory work!

Latin
We are learning the Anima Christi by listening to a few different versions on youtube.

History
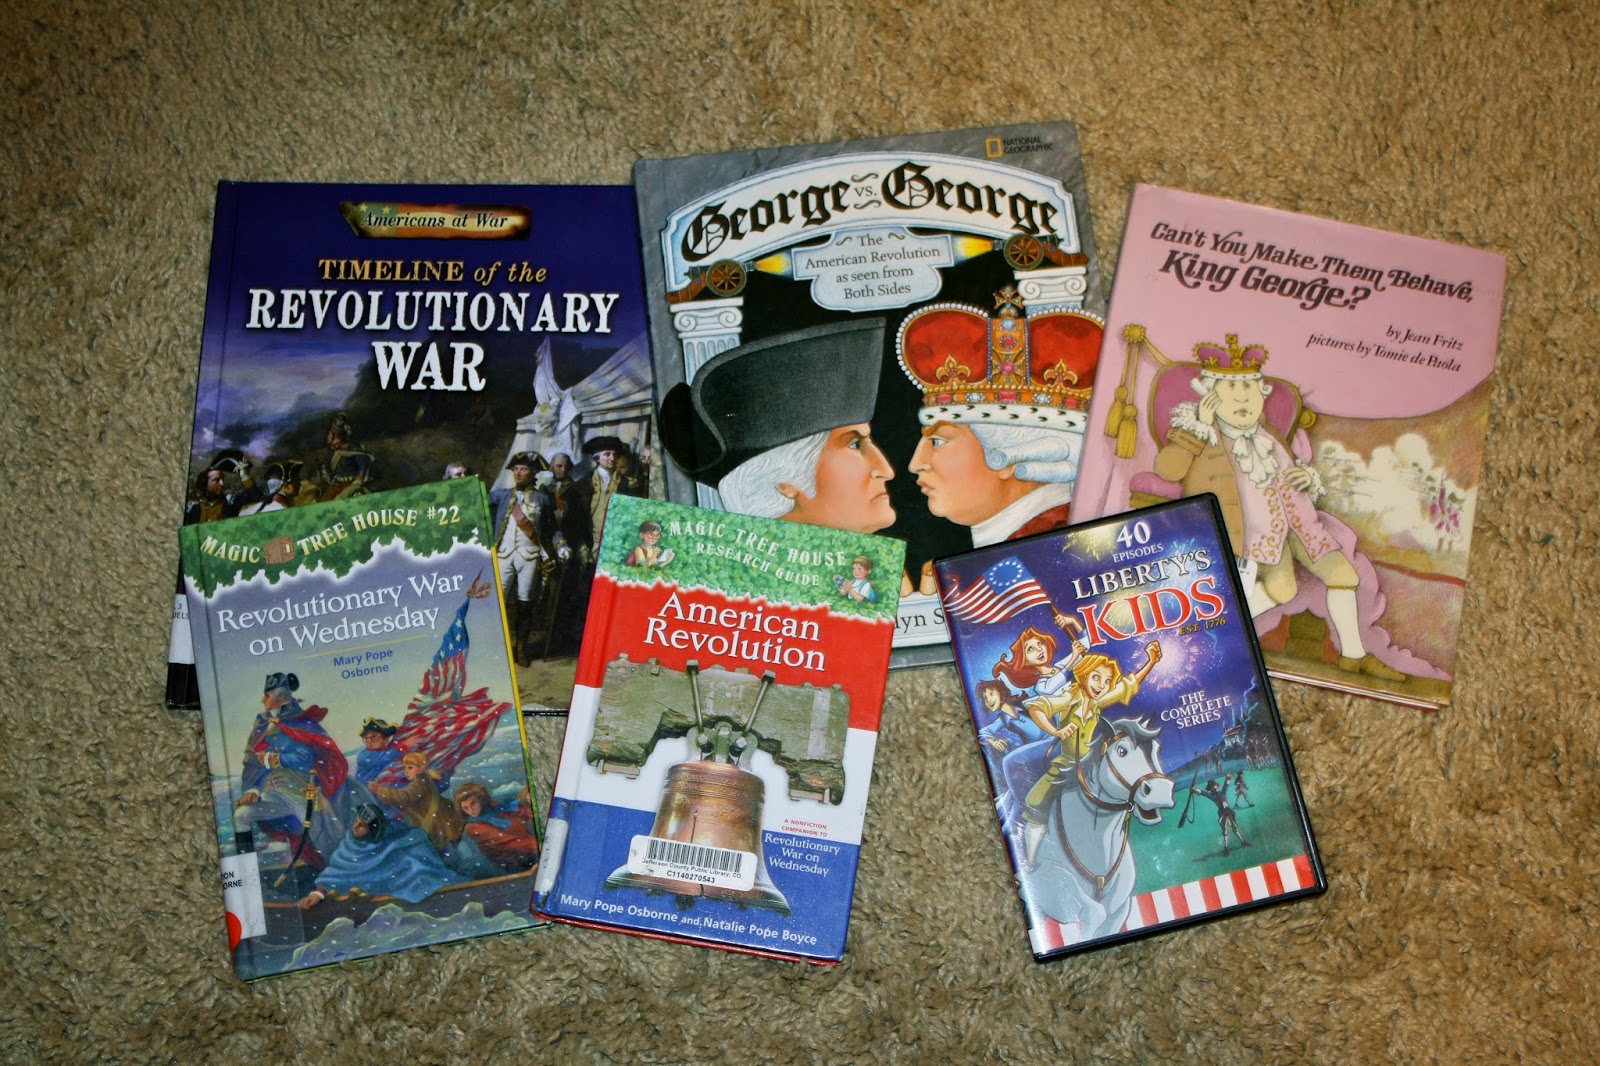
This week's history sentence takes a look at the American Revolution and George Washington. This of course necessitated a George Washington craft complete with a cotton ball wig from DLTK-Kids. Once we had a grasp on President Washington's hair, we read George vs. George to understand him as a leader.


Other books in our studies this week included Revolutionary War on Wednesday and it's Nonfiction Companion: American Revolution, and Can't You Make Them Behave King George? The Timeline of the Revolutionary War was cool, but too much for my 7 and 5 year old. And I continued to score big points in the Best-Mom-Ever category by letting the kids watch three fitting episodes of Liberty's Kids: The Shot Heard Round the World, Bunker Hill, and Across the Delaware. Or you can watch this School House Rock song that pretty much sums up the entire history sentence.


Science
Here it is, your one week on sound, so listen up. (Sorry about that.)

Lesson 1
The supplies we used for lesson one are:


First we read All About Sound and then we did a few demonstrations on sound begin caused by vibrations. The Rookie book suggested a demonstration with a ruler...


and the CCM Teacher Text gives instructions for one using a tuning fork. (They suggest an optional percussion hammer, it is completely unnecessary.)


Lesson 2
In our next lesson we looked at sound as a wave and how sound works through mediums. Activity 6 in the Teacher Text gives instructions for a demonstration on sound in a medium, by using a glass and rubber band. My kids couldn't tell the difference between the band being plucked with the glass next to their ear versus it being plucked while the glass was pressed against their ear. Maybe they need their hearing checked, but it didn't work for us.


However, activity 4 was thoroughly enjoyed. Learning about sound waves by playing with dominoes, what's not to love?


Then we watched a Bill Nye episode on Sound. Bill Nye episodes always end with an educational music video that is set to a pop song, but my kids never understand this because we don't listen secular stations on the radio. According to Bean, this episode's song, Sound is a Vibe, set to I will Survive, is sung by girls who are dressed immodestly. I agree. Feel free to skip the last few minutes.

Math
We used a worksheet from Math Worksheets 4 Kids to help us understand this week's memory work on the area of a rectangle.

There are some interactive games online you can use to review perimeter (week 12) and learn area. Check out Finding Area and Perimeter and Party Designer (for older kids) from Math Playground for some additional fun.

Timeline

Lesson 1
Our timeline game was awesome this week. Simply put, we played Catch Phrase with this week's cards for the phrases. Since it was just Bean and me playing we passed the disc back and forth, and picked up a new card from a pile of cards between us when the disc came our way. Our goal was to work as a team and guess all 8 cards before the timer ran out. It took about four tries to get it.

This would be a exciting game to play in a co-op setting if you put 2-3 weeks worth of cards in the pile for review and played the game according to the standard rules. We will definitely be pulling this game out again soon!


Lesson 2
Our timeline book is getting quite full! Eight more images were added this week.

Geography
We finished up memorizing the countries in North America with a final group of Central American countries. The Kingfisher Student Atlas of North America served as our guide. I wasn't crazy about this atlas because they lumped several countries together instead of giving them each their own page, but it was the best that I could find without getting a 60 page book on each individual country.

Great Words I
We continued memorizing "Pocahontas" by Rosemary Carr Benet this week.

I don't know of any picture books of the actual poem, but as you memorize it you could do several things to learn about Pocahontas. Check out a book on her, watch the Disney movie (maybe, I don't know if it's any good, I've never seen it, but I hear it's not at all accurate), or check out this Pinterest board for snack and craft ideas.

Be saints, it's worth it!
Lisa

Thursday, March 20, 2014

Altar Decorations for the Solemnity of St. Joseph

For the past five years we have hosted a party on the Solemnity of St. Joseph, so I think we can now call it a tradition. When I told Bean that last night was our 5th party she said "Oh, so we've been doing this since I was three." She's right, that's crazy. Over the years I've added a little bit to our St. Joseph's Day collection and the results are below.


Our St. Joseph statue was purchased while on pilgrimage to France (I know a statue from Italy would make more sense). He sits in our living room all year long and gets a really special place on his feast days. The three boxes wrapped in red paper are used for the three tiers (for the trinity and three members of the holy family) of the altar. The bottom two are lidless shoeboxes so I can nest them into each other to save on storage space.


Throughout the altar I place red table tents with explanations for the various traditional items that can be found. For more details on these items check out my post on the altar symbols and their meanings.


Cream puffs are a non-negotiable must for any St. Joseph's altar. Don't even try to have one without them, the Italians would never forgive you.


I printed a set of St. Joseph Memory Match Playing Cards from Shower of Roses, backed them to red construction paper, and use them each year to decorate in various ways. The above cards have been clipped onto a medium sized clothes pin that is glued to a wooden stick. I then held the sticks up in a glass full of breadcrumbs, which is symbolic of sawdust because St. Joseph was a carpenter.


I placed another set in our lima fava beans. One day I will splurge and buy some real dried beans on Amazon because I can't find them locally anywhere.


Way at the end of the altar you can see our fake lilies. For a few years I could never find fresh, pure white lilies, so I went ahead and bought some fake ones. They work great for Easter as well!


I love my hanging tissue paper fans. Check out this tutorial to make your own, just don't add the bunny :).


And finally I made a pendant banner stating "Happy St. Joseph's Day". If it said "Happy Solemnity of St. Joseph" it would have been out of control long. Shanty 2 Chic is my hero for making the entire alphabet, numbers, and several symbols available to print for free! For the dot in St {dot} Joseph I had to print an exclamation point, then cover the top line with paper and make a copy. Whatever works!

Next year I hope to add some fun red and white straws and those real fava beans!

Be saints, it's worth it!
Lisa