|
| St. Thomas Aquinas and Bl. Chiara Badano |
 |
| St. Theresa Benedicta of the Cross (also know as Edith Stein) and St. James the Greater |
 |
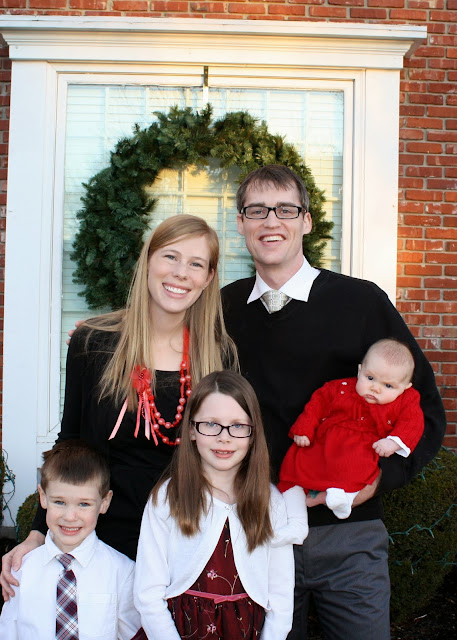
| Mary, the Mother of God and St. Joseph the Worker |
 |
| St. Clare and St. Nicholas |
 |
| St. Francis of Assisi and Bl. Mother Teresa |
 |
| St. Gerard and John the Baptist |
 |
| St. Zita and St. Josemaria Escriva (painted by a husband!) |
Doing an exchange is definitely the way to go if you want to beef up your collection quickly, and you know you want your own collection, so here is your step by step guide on how to plan a saint doll exchange.
Step 1: Find crafty or not-so-crafty friends who would like to have a saint doll collection for their kids. Maybe they are ladies from your moms' group at church, friends in your homeschool co-op, religious ed class or catholic school, book club buddies, or Little Flowers/Blue Knights/American Heritage families... just find a community!
Step 2: Decide how many dolls you will paint. In our first exchange there were only four of us, so we each painted four dolls four times, for a total of 12 dolls. For the second exchange another friend jumped in and we painted three dolls five times, for a total of 15 dolls. This last exchange there were seven of us so we only had to paint two dolls seven times, for a total of 14 dolls. Decide what your crew can manage, but I'd definitely shoot for getting at least 10 dolls each.
Step 3: Decide what size of doll you will use, as well as if you will use only the male dolls or both the male and female dolls. We use all small, male dolls. This keeps things nice and simple for us.
Step 4: Take orders for unfinished dolls and then have one person order them in bulk. This saves money! We each ordered enough dolls for two exchanges, so we wouldn't have to reorder again each time. Once they arrive, distribute the dolls.
Step 5: Decide who will paint which saint. This is a fun part. For our group, it hasn't really mattered which saint each individual picks, you just want to make sure you don't have any duplicates, including from past exchanges. You could also go with a theme, like making a set of the apostles, a nativity scene, or a resurrection scene. In this case you'll have to decide who is assigned to which saints/characters for the set.
Step 6: Get painting. I'll put together a tutorial on that soon. For now, just buy acrylic paint (not the kid kind) and paint them.
Step 7: Meet for the exchange! We have a lot of fun with this night and make the revelation of each saint a bit dramatic. We go around the room bringing out each doll one at a time and the painter of the saint gives a short bio on their life. They also share the story of how they designed the saint and anything they learned in the process of painting it. It's very girly, oooh and aaah-y, and so much fun.
That's it! Gather your friends and let me know how it goes!!